Index:
To send the information generated by your bot, automatically, to Chatbase it is necessary to inform Blip about the API-KEY of your bot in Chatbase. Follow the steps below to perform the integration.
Creating a bot at Chatbase
If you already have a bot on Chatbase, go to step 2 (Adding Chatbase API-KEY to Blip). If you have not yet created a bot on Chatbase follow the steps below
- Access Chatbase
- Access/Create your account


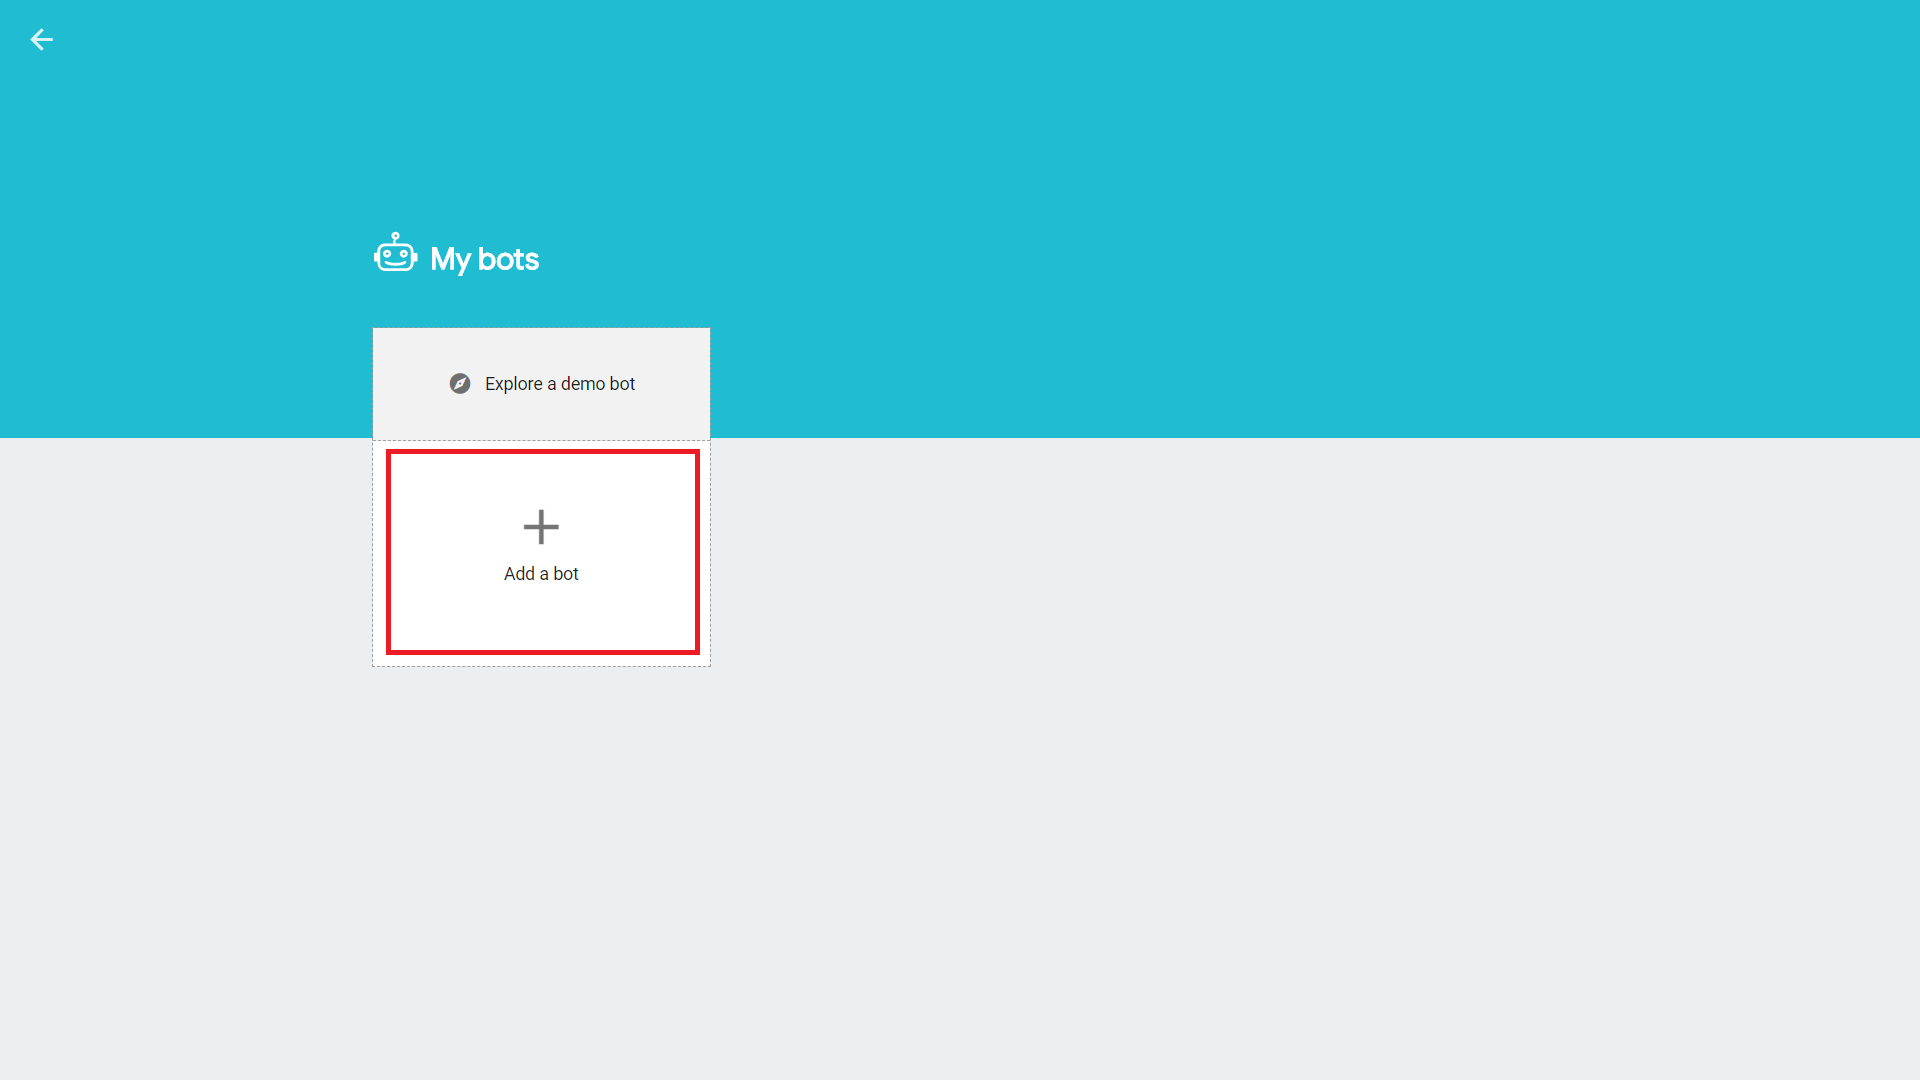
- Click the Add a bot button

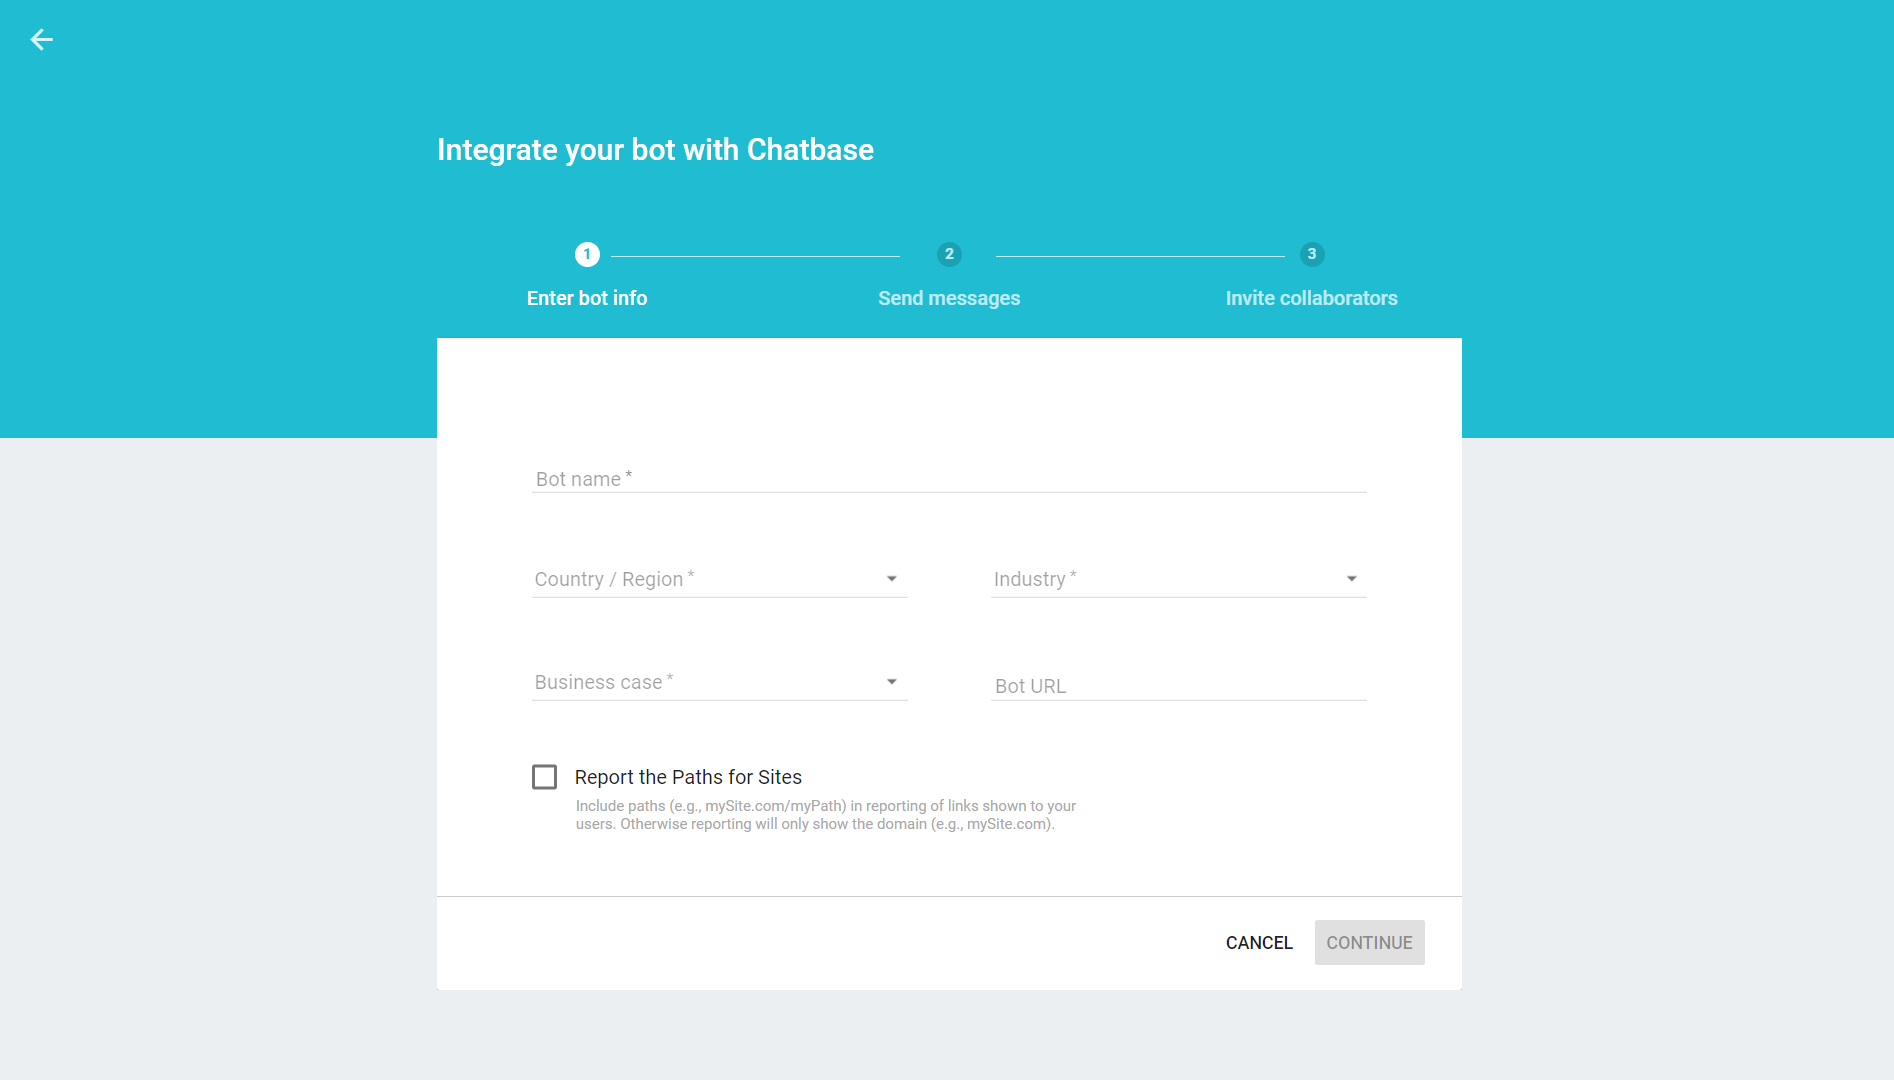
- Enter the necessary data and click Continue

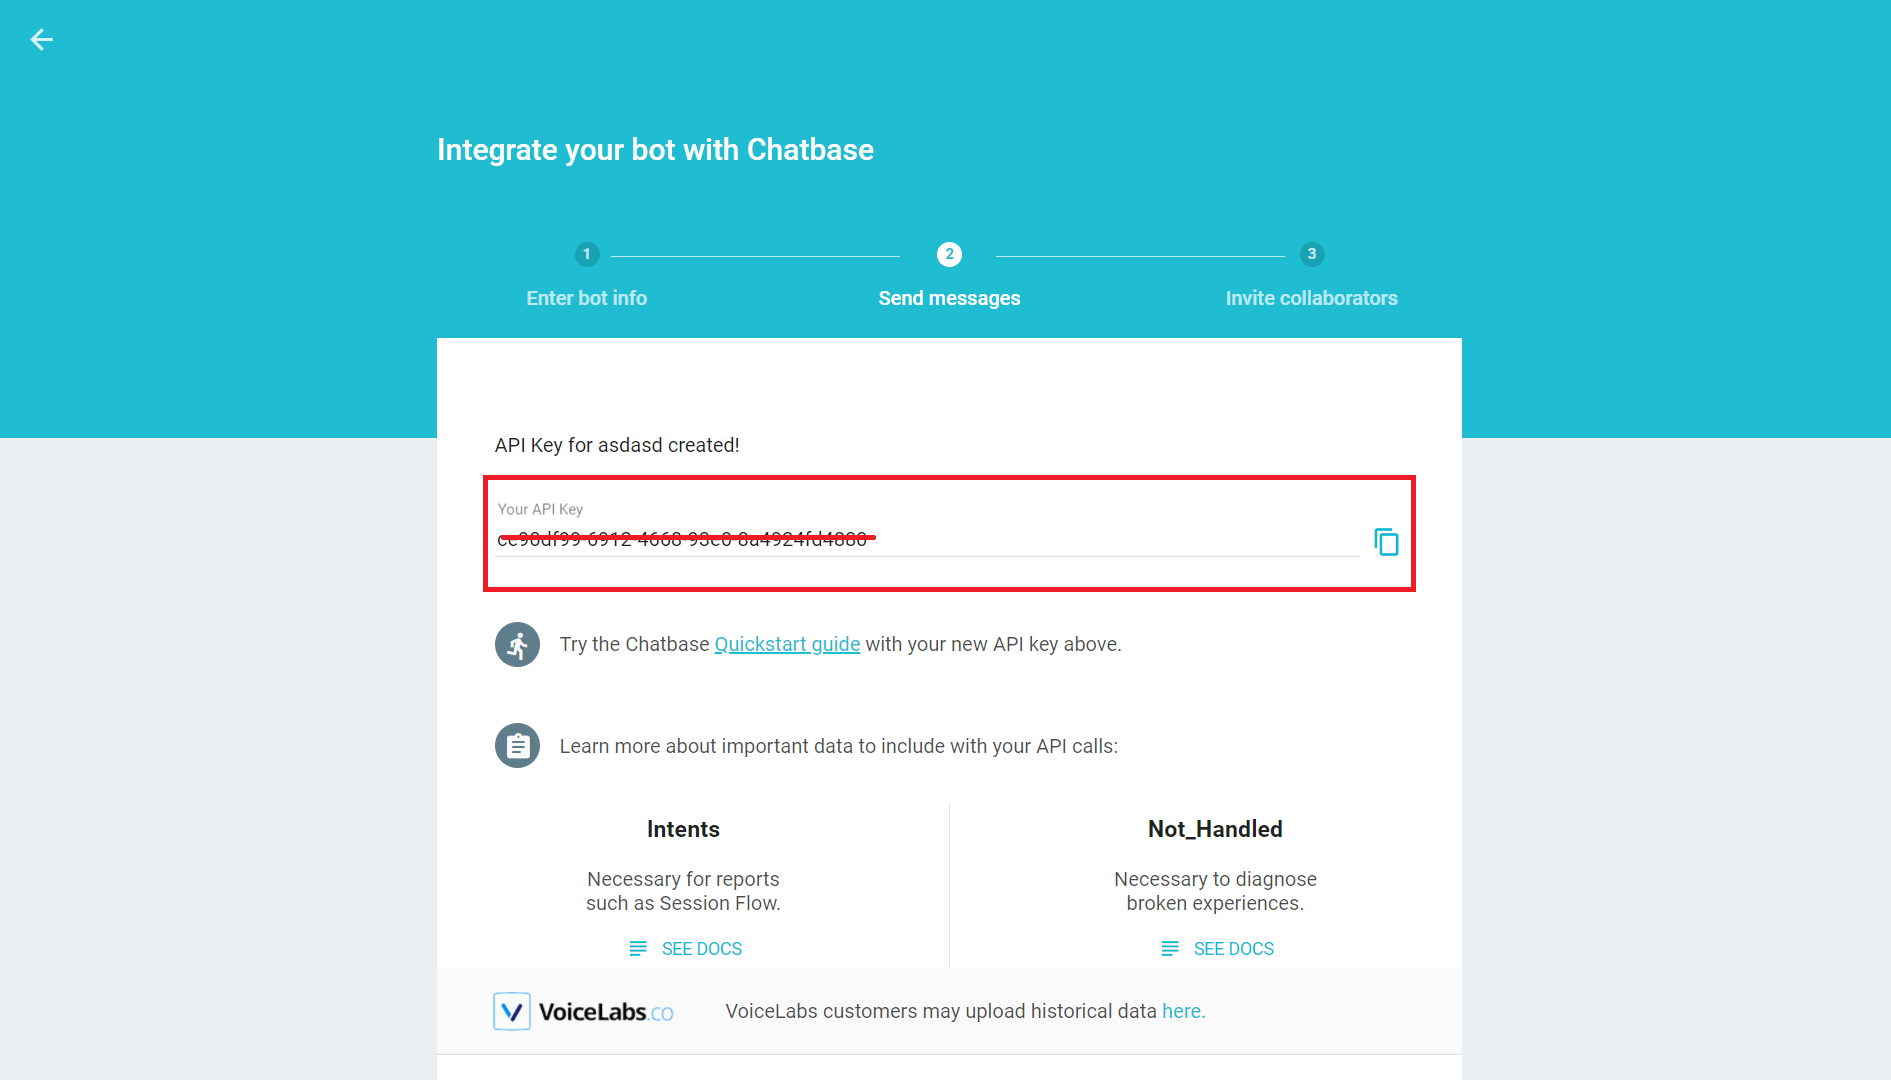
- Copy your bot's API-KEY, you will need this information in step 2.

- Finalize the creation process
Adding Chatbase API-KEY to Blip
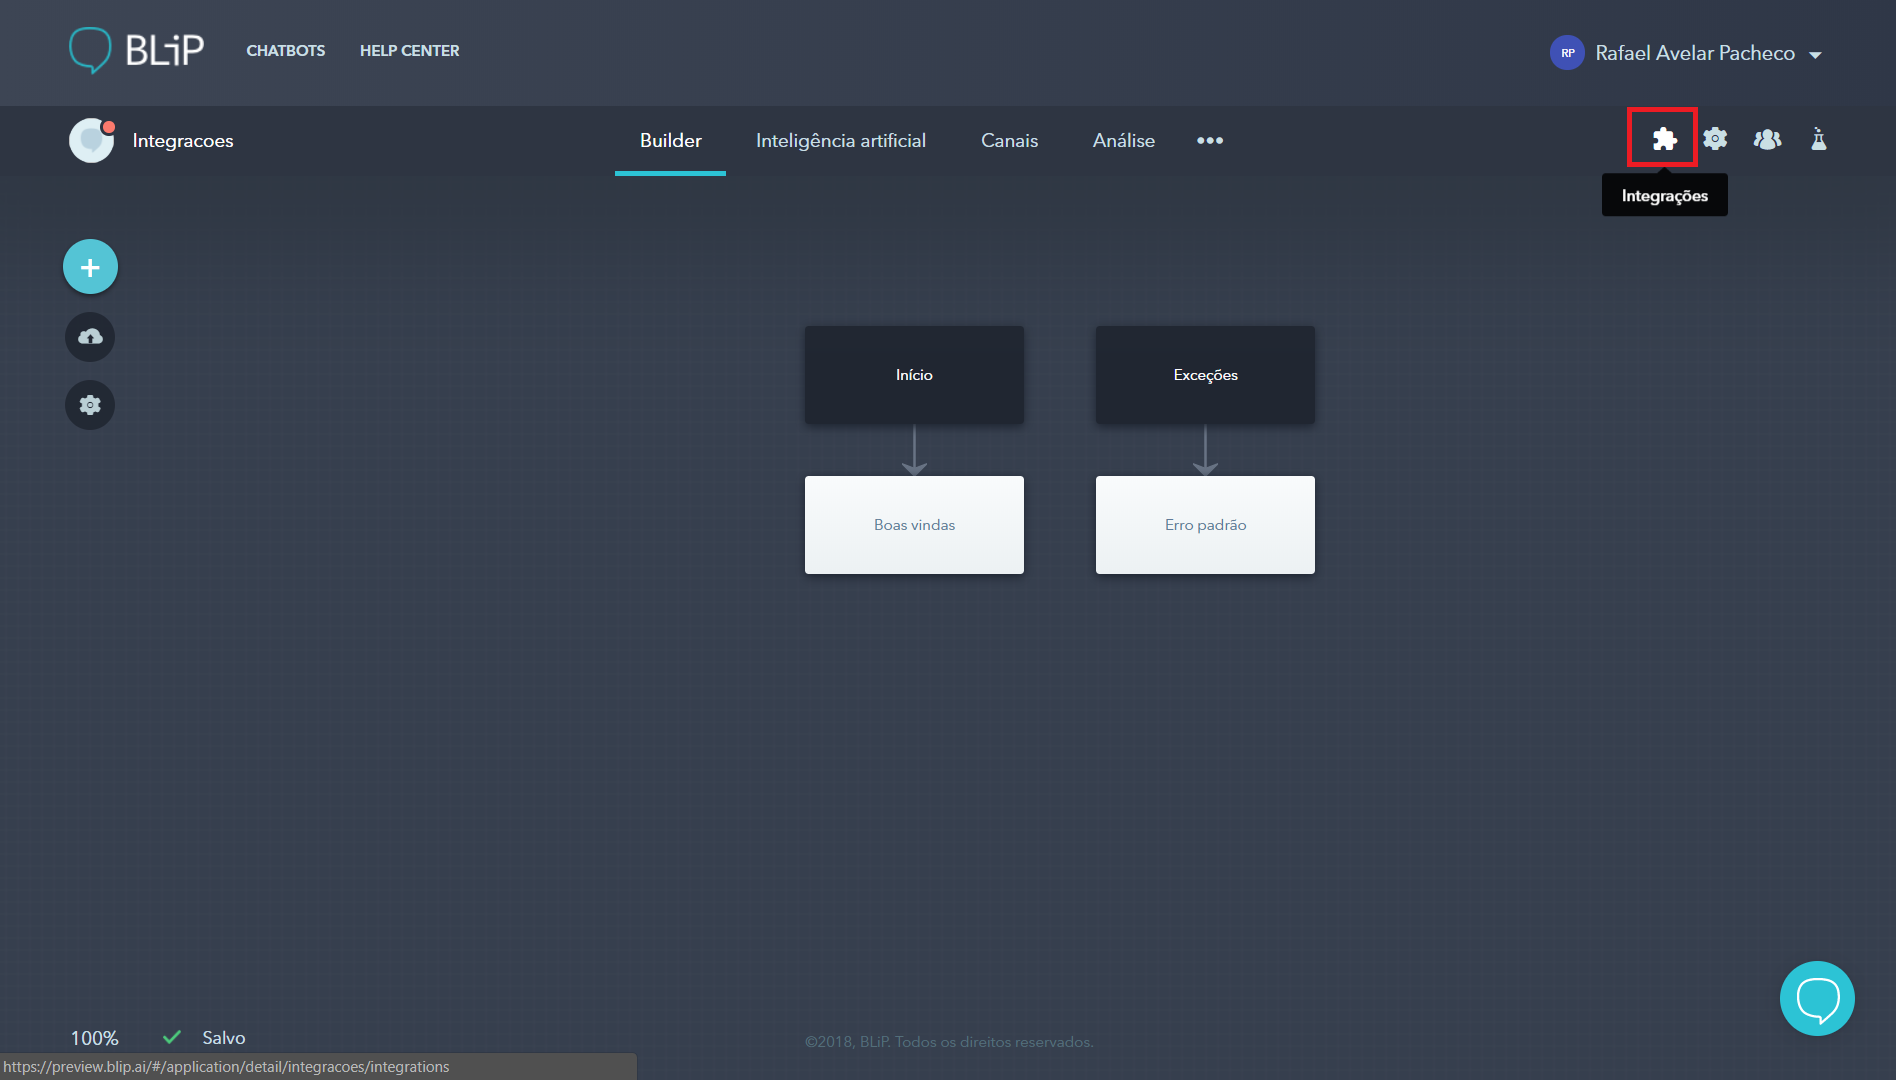
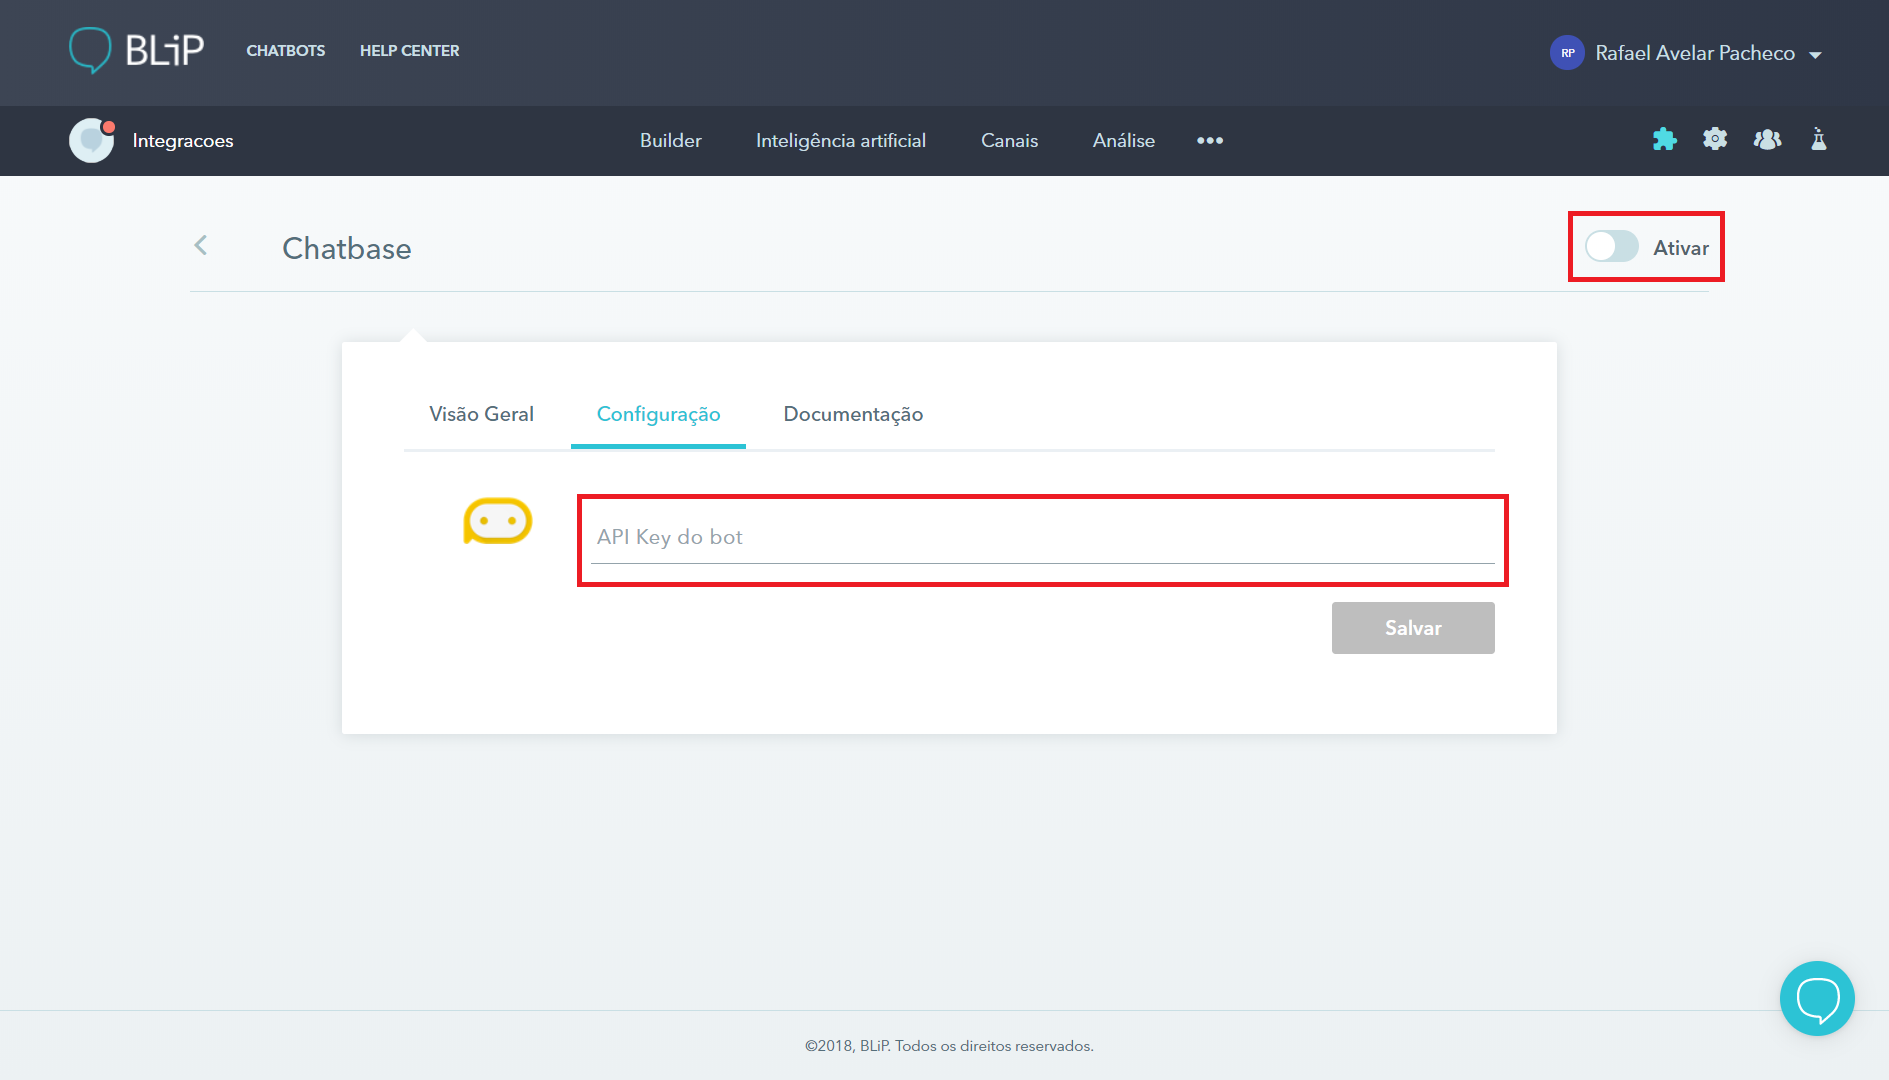
With the Chatbase API-KEY, go to the Blip portal, select your bot and click on Integrations.

Choose Chatbase integration and click on the Configuration tab. Fill in the API-KEY field with the key generated by Chatbase in the previous step and click save. After that, click on the Activate key (in the upper right field) to activate the integration.

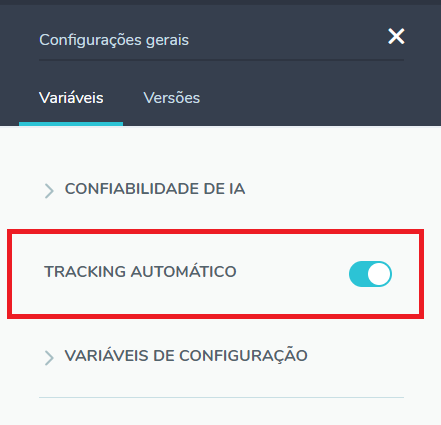
Return to Builder, click on settings and select the Automatic Tracking option. From now on, all messages (sent and received) will be sent to the Chatbase automatically.

Testing integration
All the messages sent and received by the bot are automatically sent to Chatbase. However, Chatbase has a delay (time for processing requests) that can vary from a few minutes to 6 hours.
Thus, after the integration has been carried out and some messages have been sent, it may be necessary to wait a few hours until the data is available on the Chatbase dashboard.
For more information, visit the discussion on the subject in our community or the videos on our channel. 😃